The F7U-1 Cutlass vs S2F Tracker
This isn’t some “what if” matchup like you’d see on YouTube. Although both these aircraft, the F7U-1 Cutlass, and S2F (later S-2) Tracker, would have served alongside each other in U.S. Navy carrier operations for a short time.
The story in my head goes something like this:
Somewhere in the Pacific Ocean during the mid-1950’s two unique aircraft find themselves taking flight from a U.S. Navy aircraft carrier. One is a small twin engine aircraft driven by two radial engines and chunky three bladed props, that looks more like something out of World War II than the 50’s. The small plane, the Grumman S2F, has the unique task of hunting enemy submarines lurking out beyond the horizon. The other aircraft looks like a spaceship from a science fiction comic book of the day, the F7U-1 Cutlass, a jet fighter from famed F4U Corsair designer Chance-Vought.
As the sun rises the Tracker and two Cutlasses approach the catapults. The Tracker is the first to launch off cat 1, and once skybourne banks to the right heading North to assist an ASW picket destroyer with an unidentified sonar contact. Meanwhile the two Cutlasses move into position on cats 1 and 2, on a routine patrol of the skies around their mothership. Both aircraft ever vigilant of the hidden dangers around them.
Good narrative right?
The Matchup on My Table
So much like the F2A2 and F-80 previously, this is another match up of two kits by two different vendors. Like the last two kits there are also some first going on here as well.
Both kits are my first twin engine builds, prop and jet, since my return to model kit building as an adult. This is also as mentioned above my first time making aircraft kits of aircraft that would have served together in military operations, and with the same branch of the military. This is actually two firsts in one as last time it was one Navy, and one Air Force aircraft, now it’s both Navy. For the F7U-1 it would be the first time I’ve intentionally used third party decals on a kit. For the S2F this is the first Atlantis kit for me, and first with a display mount instead of landing gear.
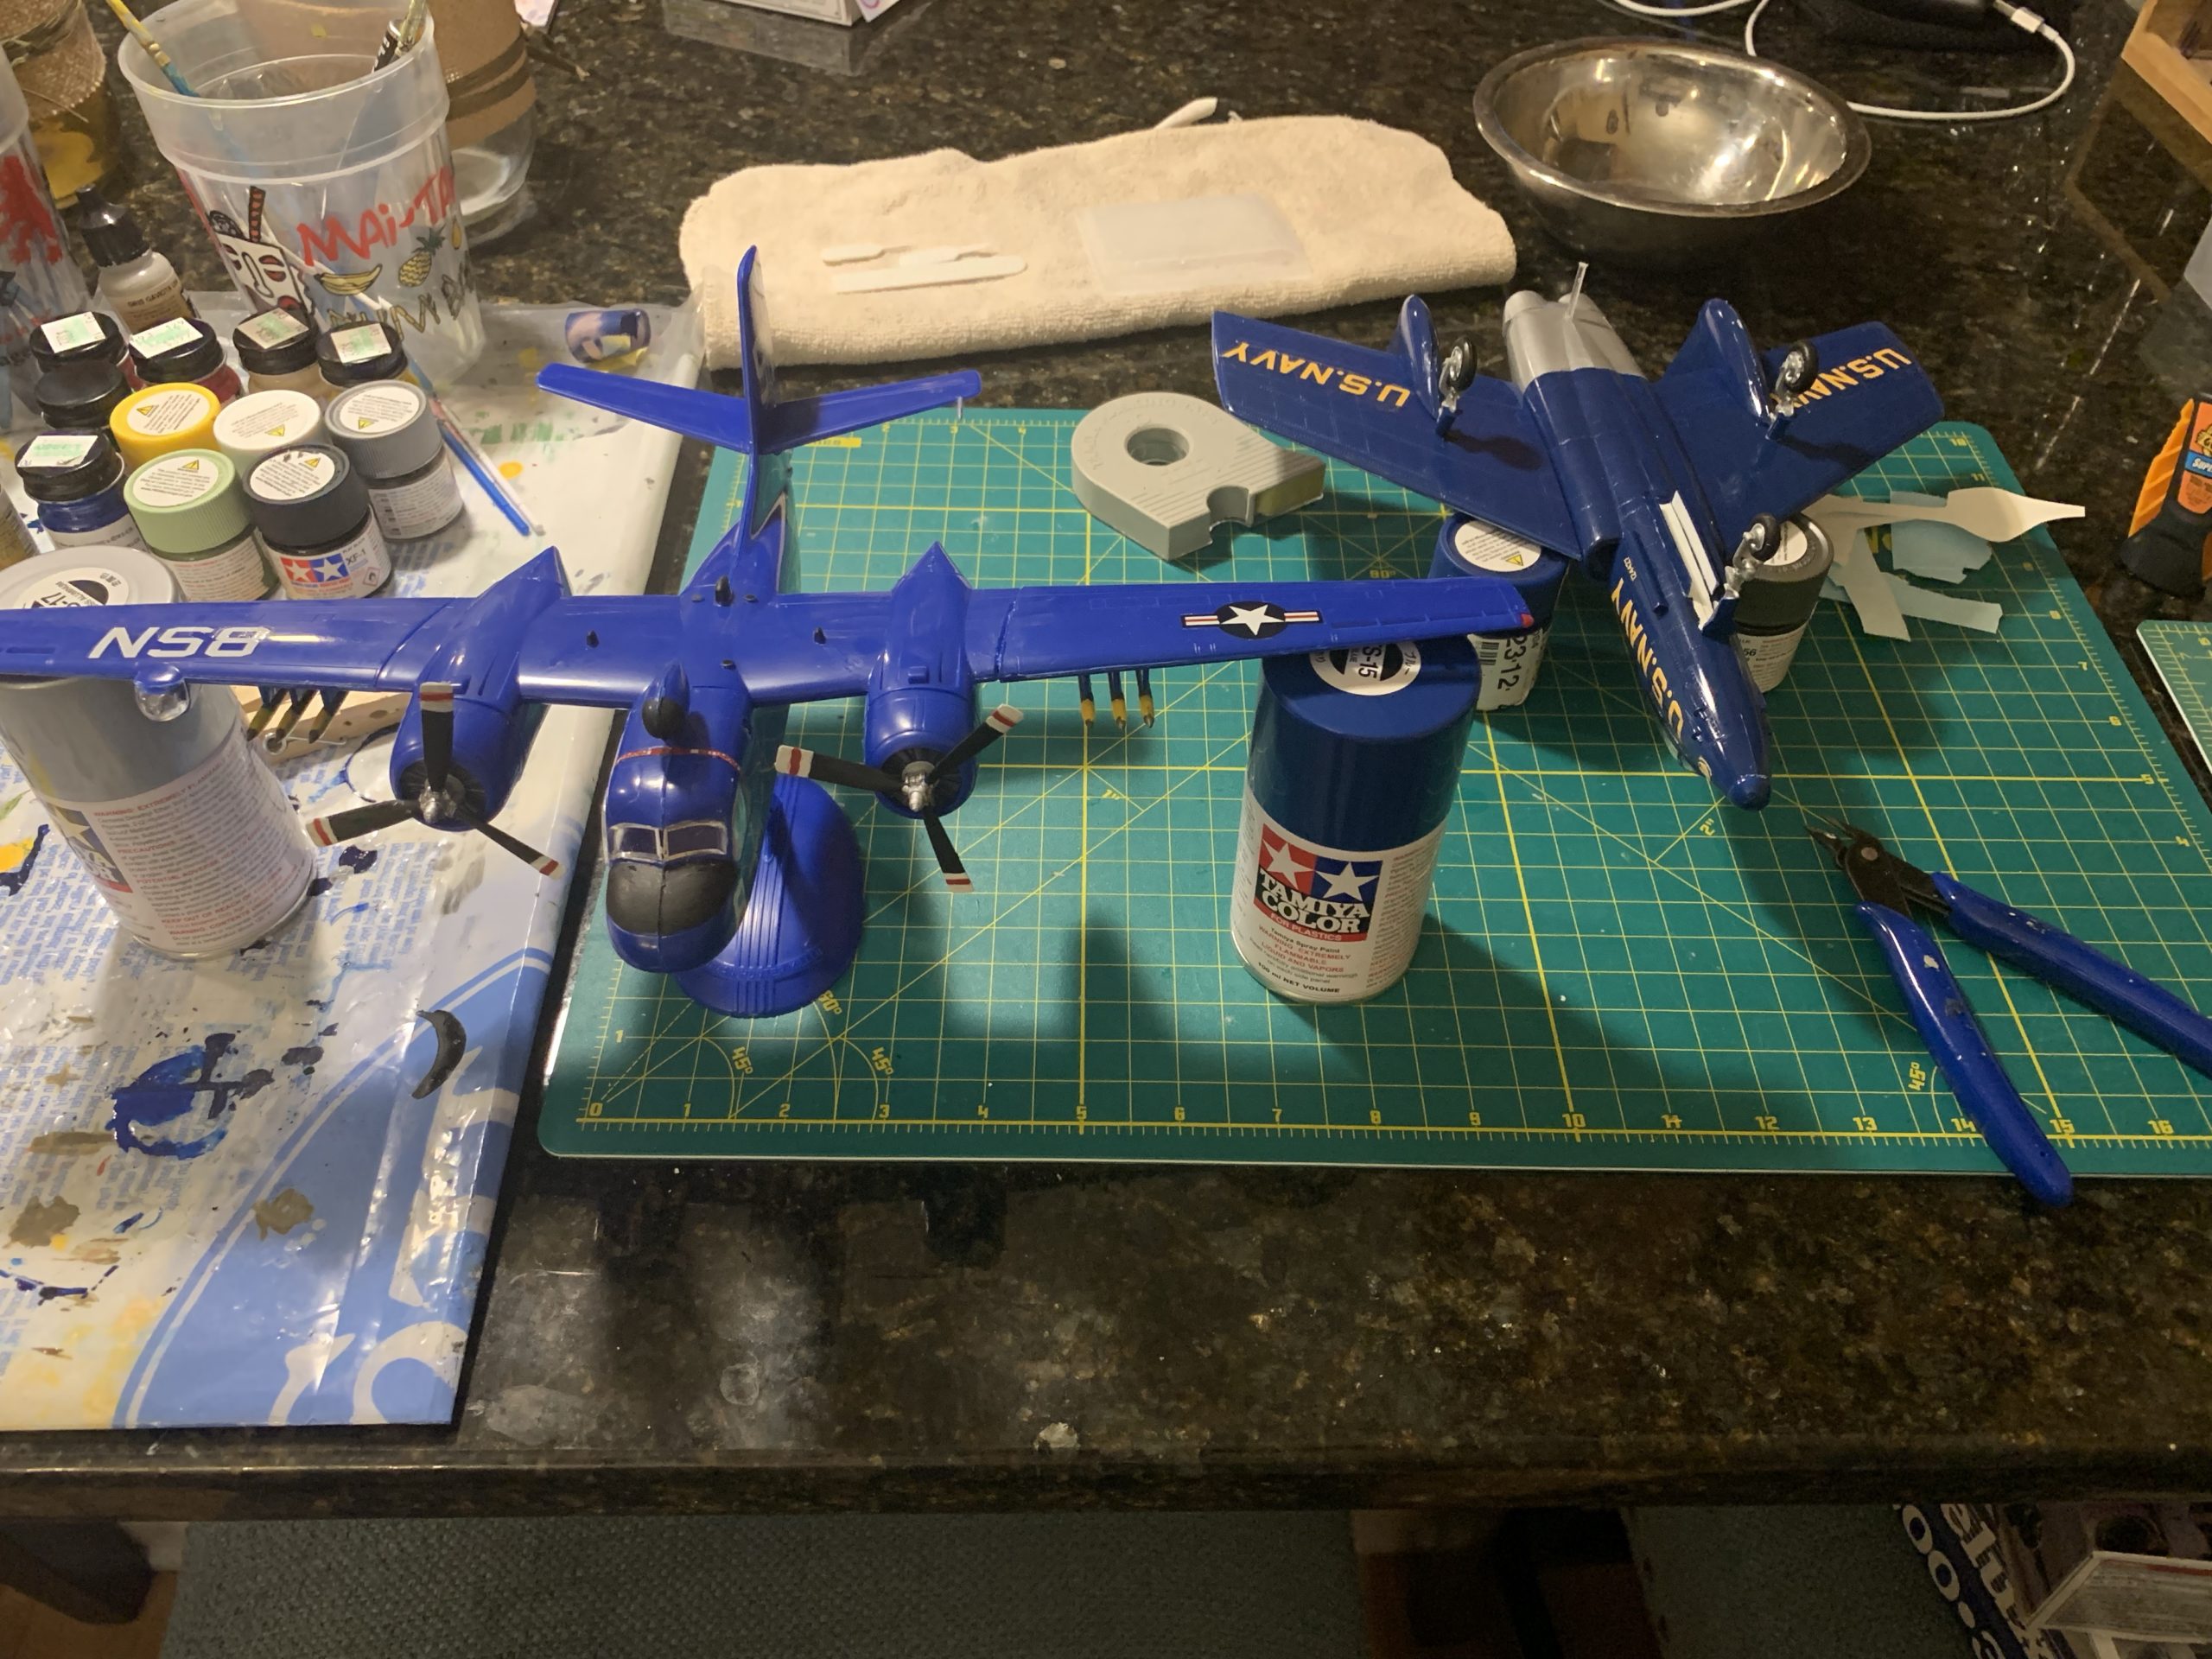
The F7U is another Lindberg kit, and another unique subject by Lindberg. If you want to know more about Lindberg please see my previous article on the F2A2 and P-80, where I went into some detail on Lindberg and their kits. I stared the kit on November 23rd a two days before Thanksgiving, and since we weren’t hosting this year it allowed me time to build without feeling like I needed to up and move the kit constantly. My biggest challenge initially was spray painting the massive aluminum exhaust area separately from the main blue color of the aircraft, but luckily freezer bags make good miniature masking tarps, especially when cut to fit.
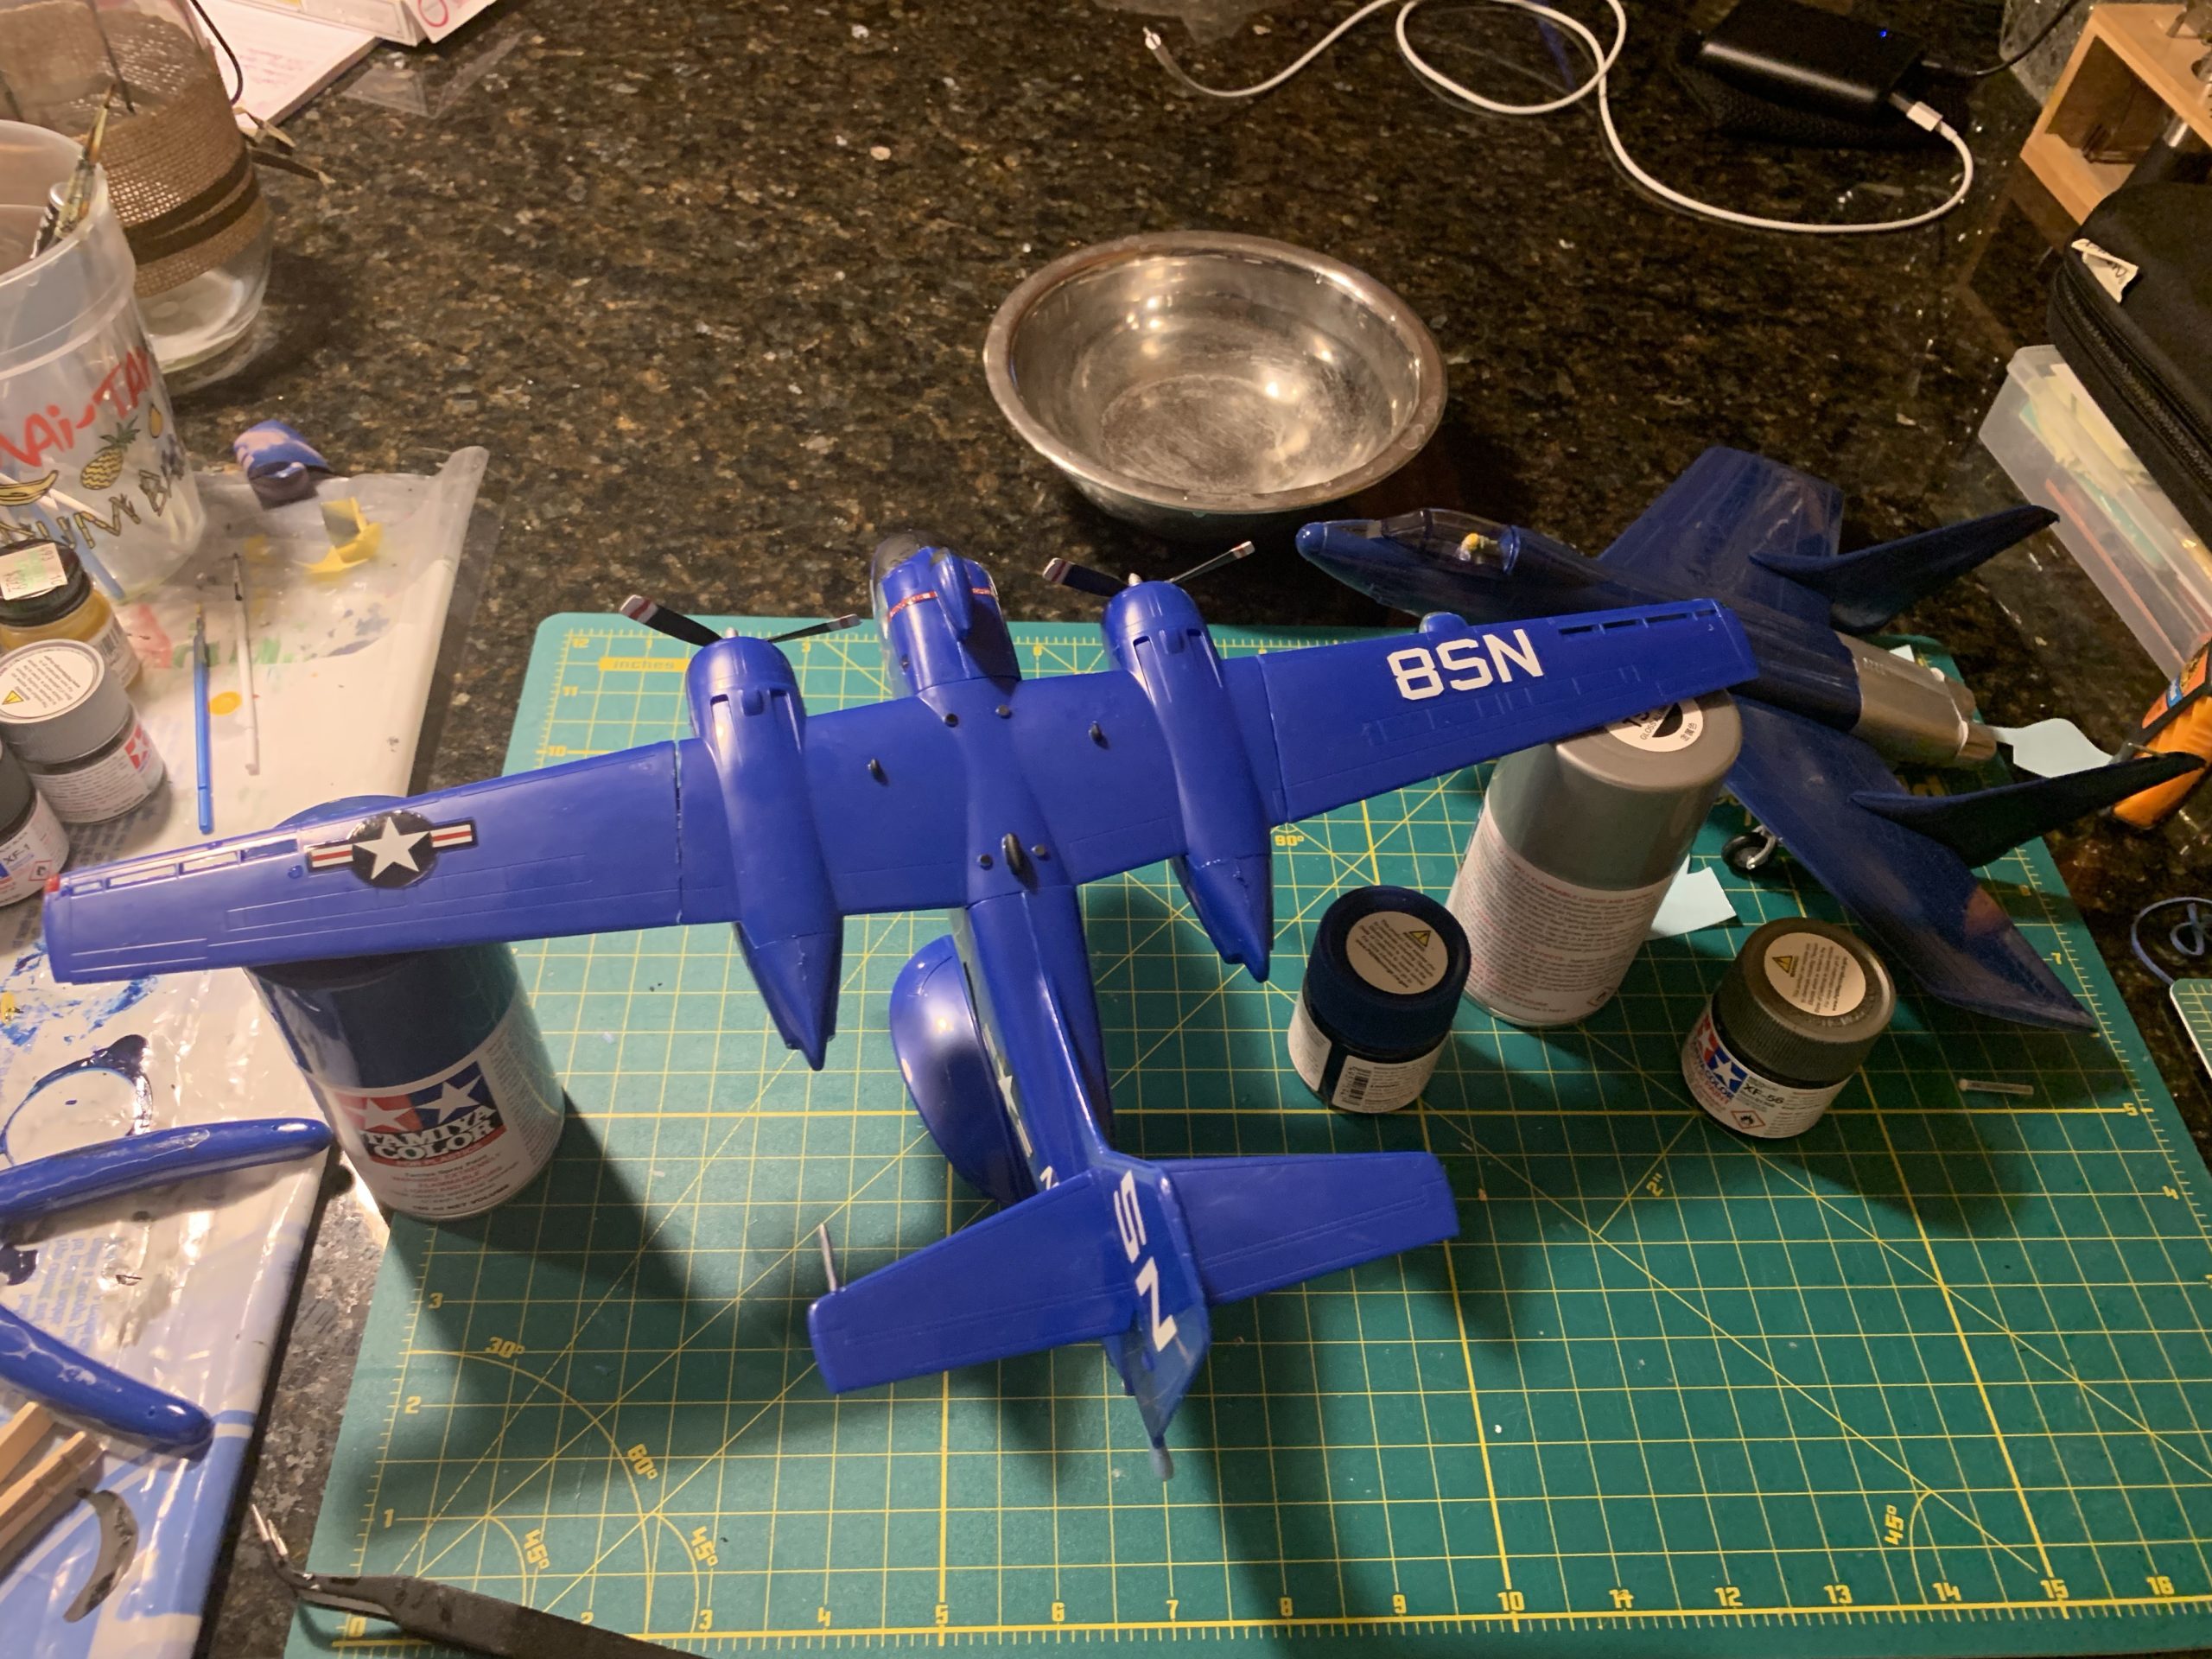
As for the S2F it was started on November 24th. Luckily the kit came molded in the right color, so no massive spray painting involved. The S2F is an Atlantis kit, and my first ever from this company. The kit was formally made by Aurora, but much like Round2, Atlantis took on a lot of IP and tooling from other model makers, the Atlantis logo even looks a lot like Auroras. The thing I like most about the kit is that it’s American made, as many of the old kits use to be, meaning we get the added bonus of descriptive English instructions.
Both kits were finished on the evening of December 1st, but the S2F remained on my board for a few more days while I filled a gap in the left wing with puddy, finally being completed by December 4th.
Two Planes Very Different History’s
In my last article I had two aircraft that had slightly similar story’s historically, as far as their service records, but never really overlapped historically although they came close. This time I interestingly have two aircraft that actually served with each other, but in the end have far different history’s.
The F7U Cutlass is a visually striking aircraft. At first glance the average person would conclude the aircraft was from a far later era. Upon further inspection though there are the telltale signs of late 40’s and early 50’s aesthetics in its design, like rudders that would go on to inspire tail fins in late 50’s cars. In a way with its large swept, nearly delta, wings protruding engine exhaust, and large rudders, the Cutlass looked more like a spaceship out of 1950’s science fiction, than a fighter plane of the era. The aircraft caught the imagination of the public, with two aircraft being briefly added to the famed Navy Blue Angels flight team. With that said outside of its space age looks there was trouble under the surface.
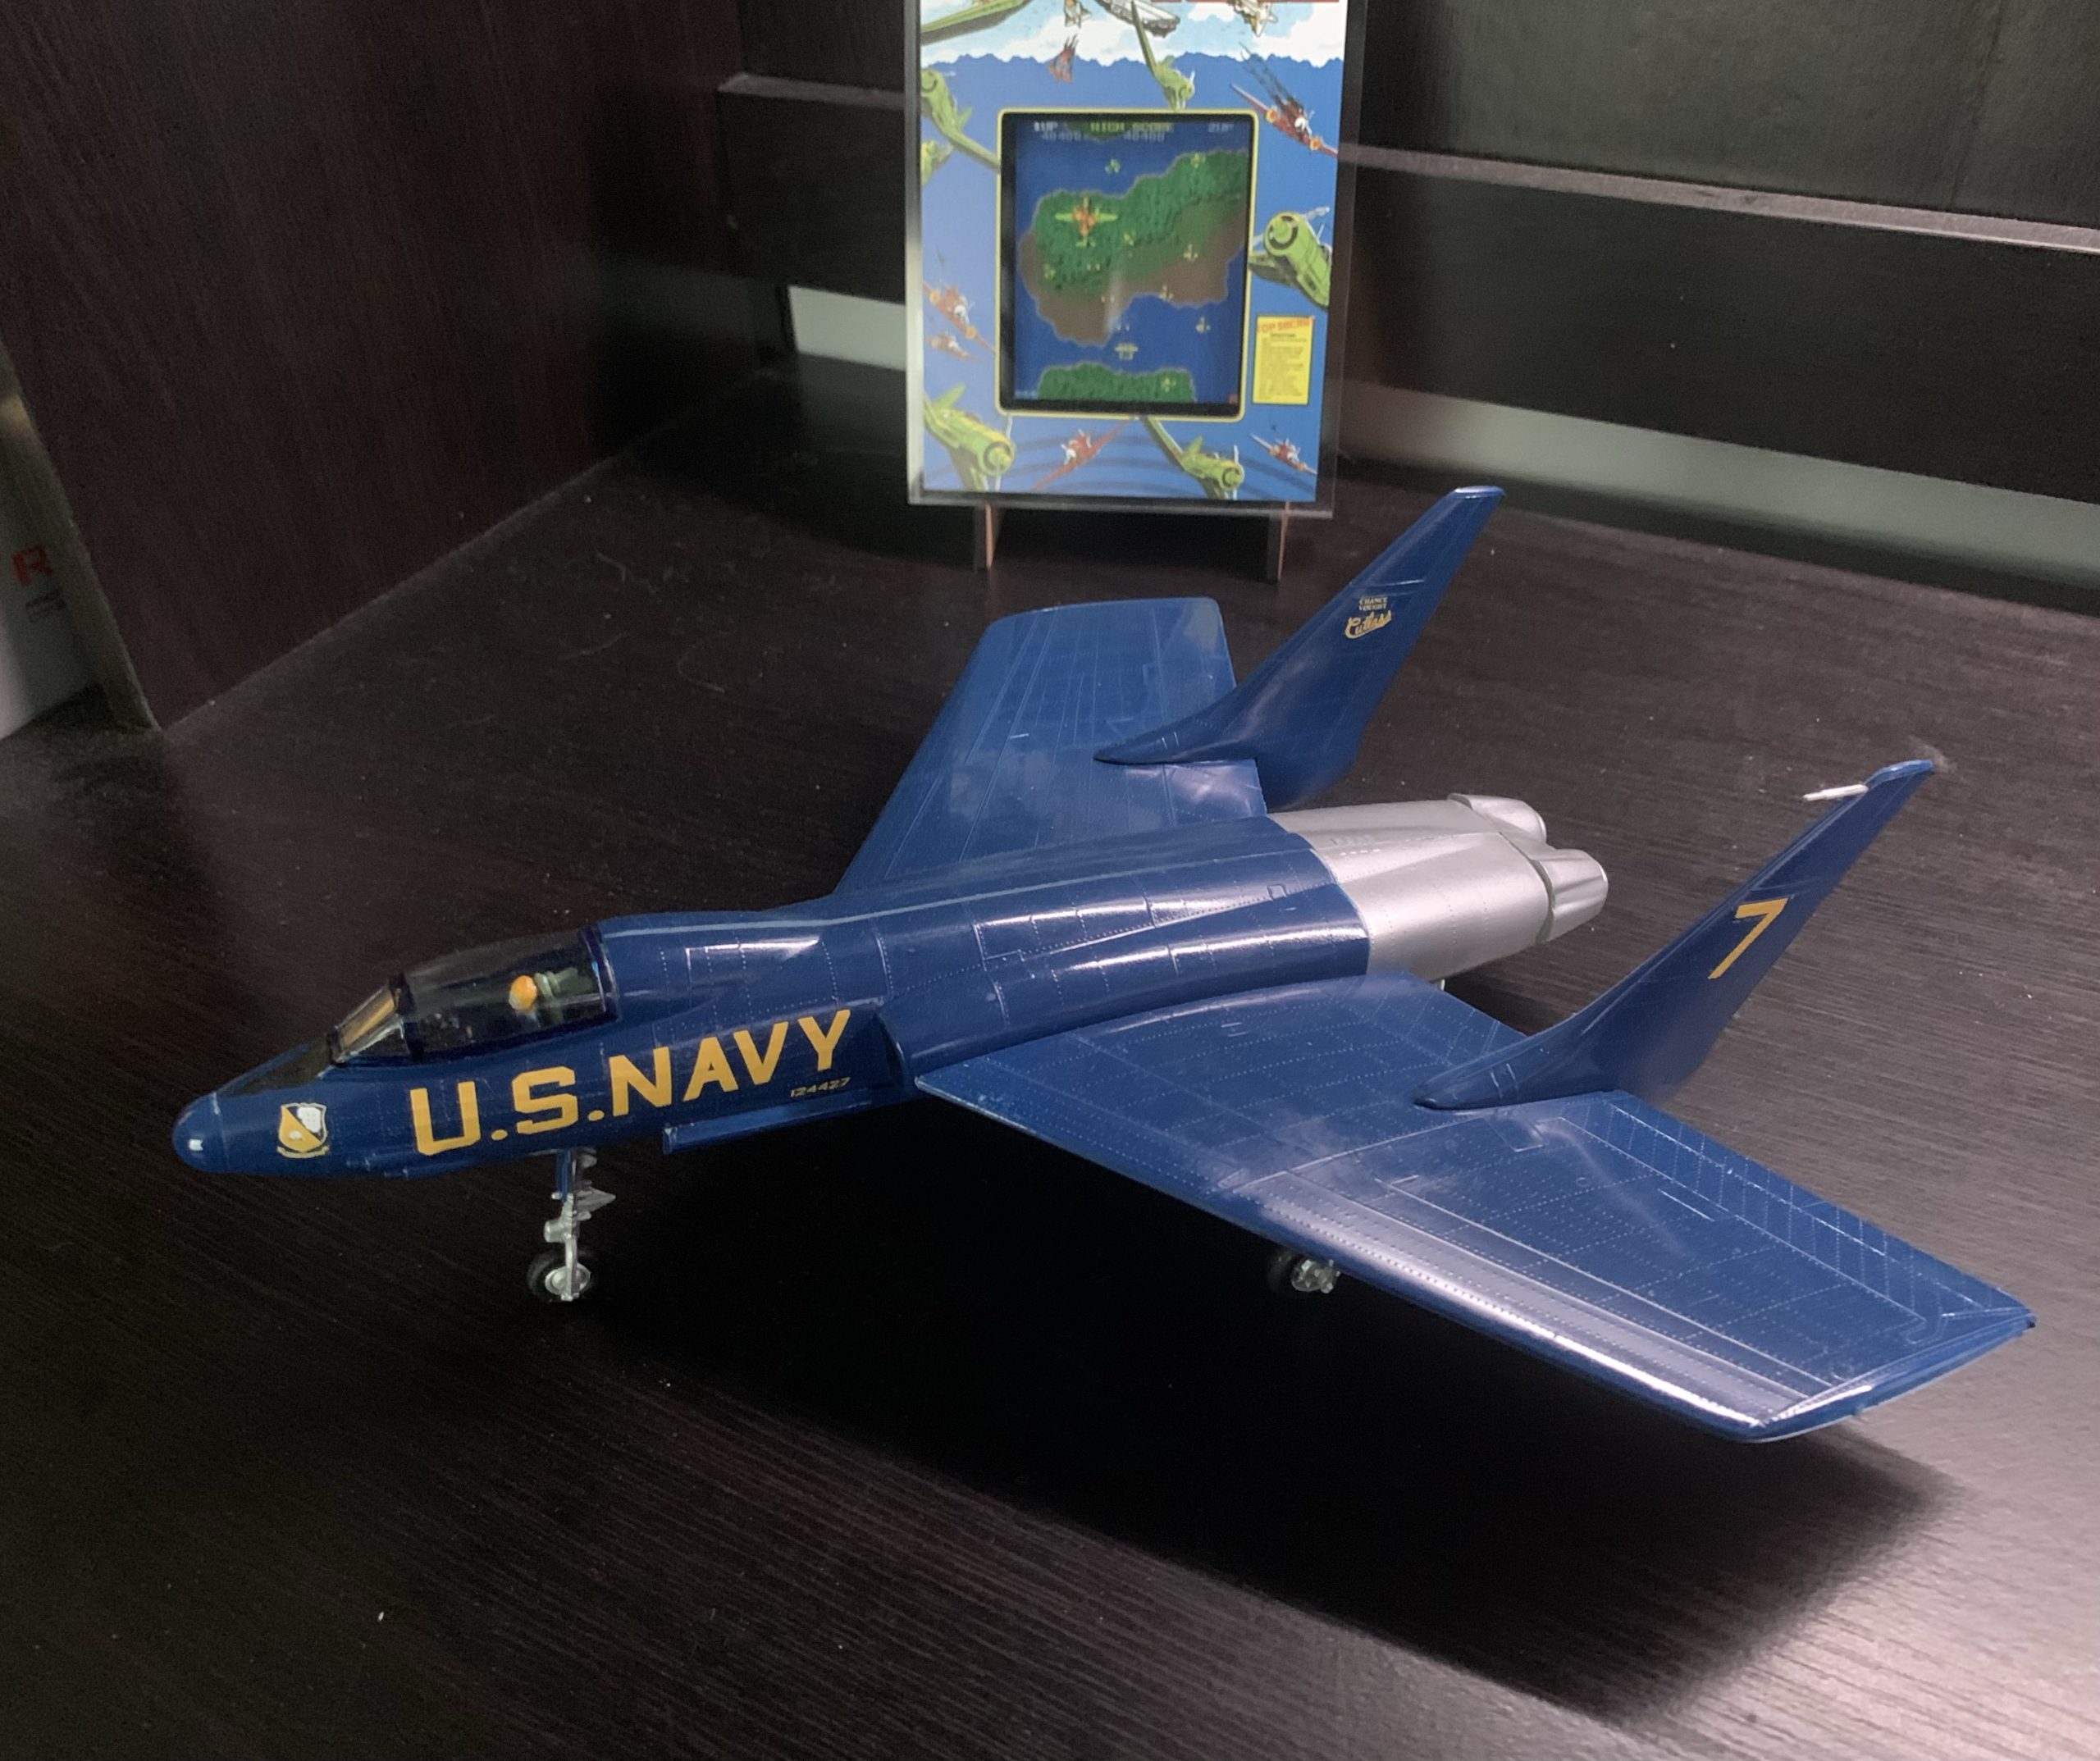
The Cutlass had a reputation as a “Widow Maker”, when it started off claiming the lives of four test pilots during its initial flight tests. In its short operational history of 8 years with the Navy, it would go on to claim the lives of 21 more pilots, and was also in many more accidents without fatalities, with an estimated 25% of the 320 Cutlasses made lost in accidents. Even for an era when the deaths of test pilots was common as new jet technologies developed, the Cutlass was controversial when it entered service. The aircraft had a number of systematic issues ranging from being hard to control, to full on structural failure. Not to mention the exaggeratedly tall front lander gear made landings, particularly on aircraft carriers, difficult and were prone to collapse when hitting carrier decks hard. In a way it’s actually surprising the aircraft didn’t go on to claim more lives than it did, although 25 was already far too high. Ironically, the aircraft would be replaced by another Chance Vought aircraft, the venerable F-8 Crusader “The Last Gunfighter”, and one of the most beloved Navy fighters of the Vietnam War.
In retrospect I’ve always believed the Cutlass design was ahead of its time. In looking at the F-117A for instance we see a very unorthodox design, that without fly-by-wire, is nearly impossible for a pilot to fly due to being inherently unstable. The story of the F7U reads like that of the F-117A, but without the benefits of fly-by-wire technology, the F7U was inherently unstable, and hard to control, with pilot error leading to some of its accidents. The question is with fly-by-wire and perhaps a change in nose gear, would the aircraft be a totally different performer now than it was then?
The S2F on the other hand has a far different history. Its design had more in common with World War II medium bombers, than the many advanced jet fighters it would share the deck with in 24 years of operations with the US Navy. The radial engines that powered it had proven themselves after years of service in other aircraft, and it’s design looked like that of small GA and commuter aircraft currently in service around the world. No hints of advanced design, or looking to capture the public’s imagination.
On the inside and in its mission it was a different story. From nose to tail the aircraft was literally packed with Anti-Submarine Warfare technology. Sonobuoys, a retractable sonordome, advanced radar, high powered wing mounted spotlight, and a tail extending magnetic anomaly detector (MAD), were just some of the state of the art ASW tech the S2F had onboard. Although, the aircraft would never see actual ASW combat it would serve successfully with the US Navy for 24 years, and is still in service with other Navy’s around the world. In the United States after leaving Navy service, many S2F’s would continue serving on as firefighting aircraft with some still in service with state and federal forestry services till this day.
In conclusion two planes, overlapping beginnings, but far different lives lead.
Model vs Model
Unlike the Tamiya vs Lindberg matchup from my Buffalo vs Shooting Star blog last time, where we had a premium model maker vs a basic one, in this case both Lindberg and Atlantis kits are on the far more basic side. However, much like the last matchup, I will say that Lindberg is going to lose this bout as well, but in a tight contest. The reason being is that despite the S2F kit not having a cockpit or pilot, this kit makes up for it with its stand, retractable MAD boom, and sonar doom. The wing mounted spotlight is also a unique detail. Sorry, Lindberg maybe next time.
Pilot vs Pilot
Lindberg wins here by default as only this kit had a pilot. I suppose I could have customized the S2F and added pilot figures though, but again those wouldn’t have come with the kit.

Cockpit vs Cockpit
Lindberg wins by default, see above
Fuselage vs Fuselage
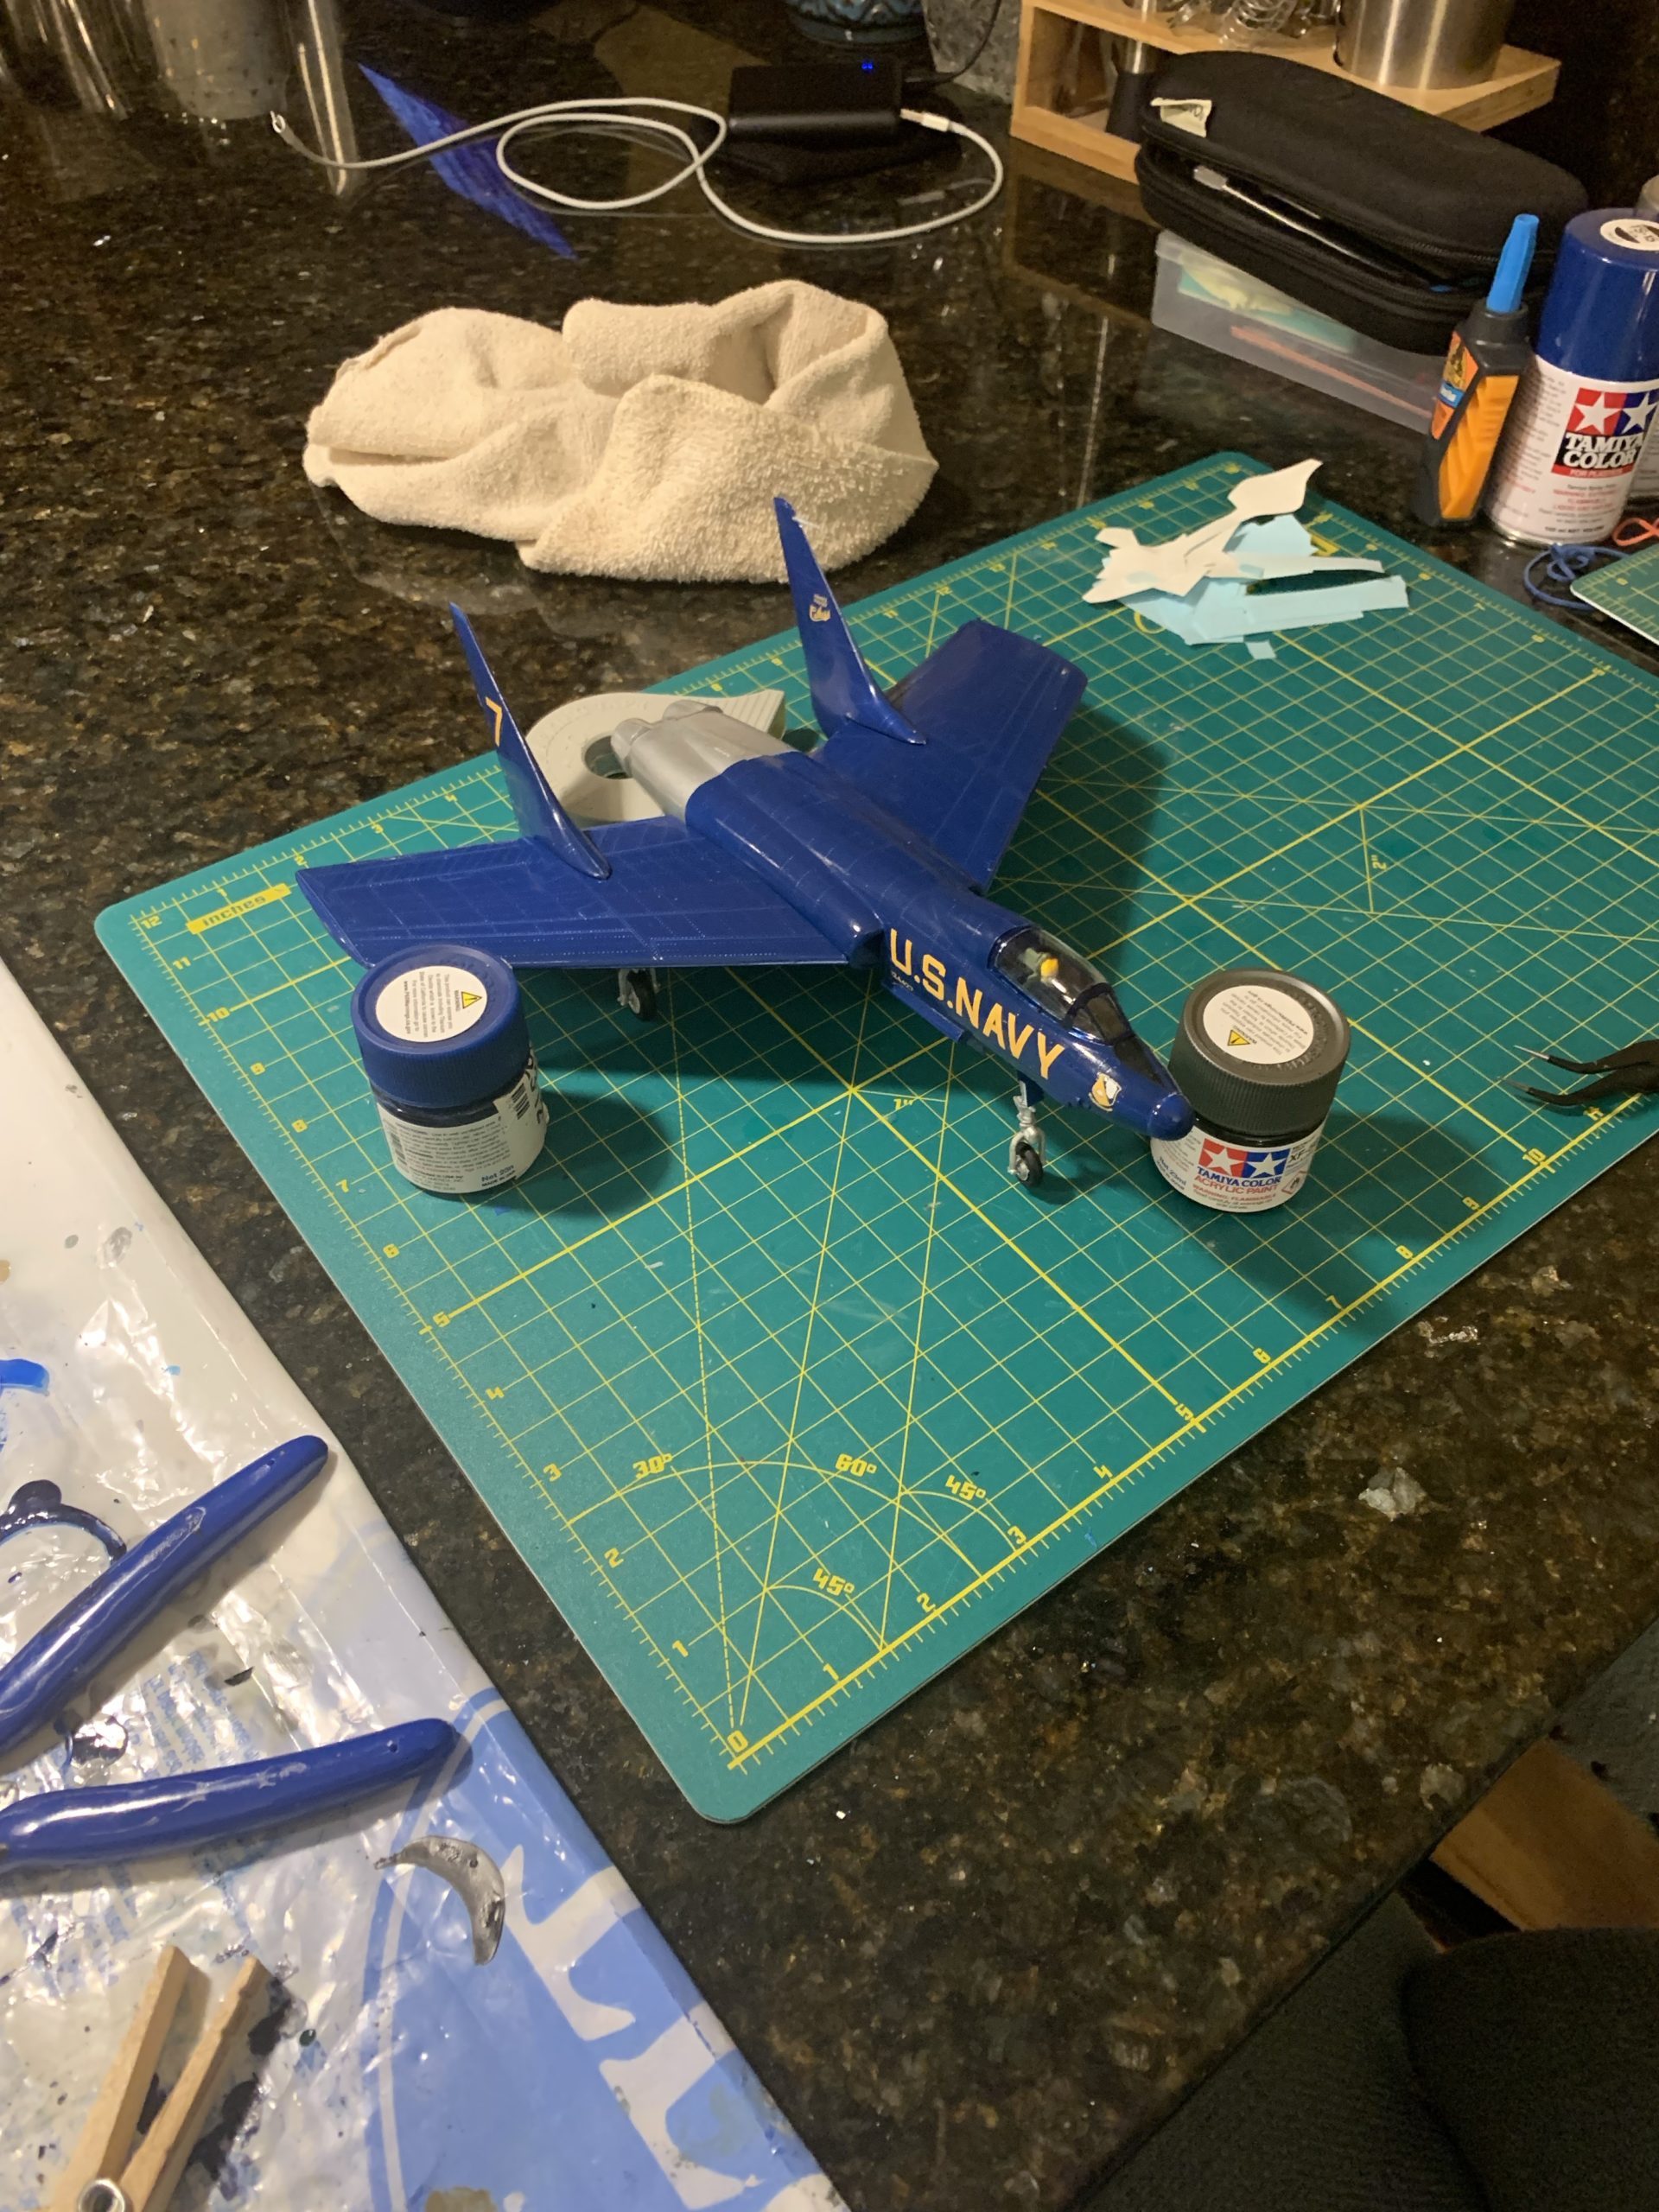
The F7U’s fuselage has a major issue where Lindberg failed to add studs and holes in the right place to keep the structure together. One Peg and hole is located near the nose, and the other on the ventral side near the tail. This caused issues with the dorsal mid area since it has no way of lining up and staying lined up. So what would be a nice looking kit is a bit blemished by being mis-aligned aligned on top. My other issue is that the exhaust piece and end of the fuselage weren’t a good fit, leaving the exhaust piece hanging a bit on either side.

On the S2F, the fuselage was well engineered, and the retractable MAD boom, and sonar dome were so well fitted they were no hindrance in putting the fuselage together. Even the two piece windshield was non-issue. Once glued I only needed a rubber band and a few clothes pins to keep it together, and after the glue had dried there were no gaps between the fuselage halves, and even the seams disappeared a bit giving a almost one piece look. It came together way better than I thought it would.
Wing vs Wing
On the F7U we had the standard upper and lower wing pieces for both the left and right side. They went together easily and stayed together pretty well. In addition to this due to large studs on the wings and holes on the fuselage, the wings went in very sturdily, basically locking into the the position they needed to be in with no movement. That was really nice. So now complaints and only kudos on the wings for this kit.
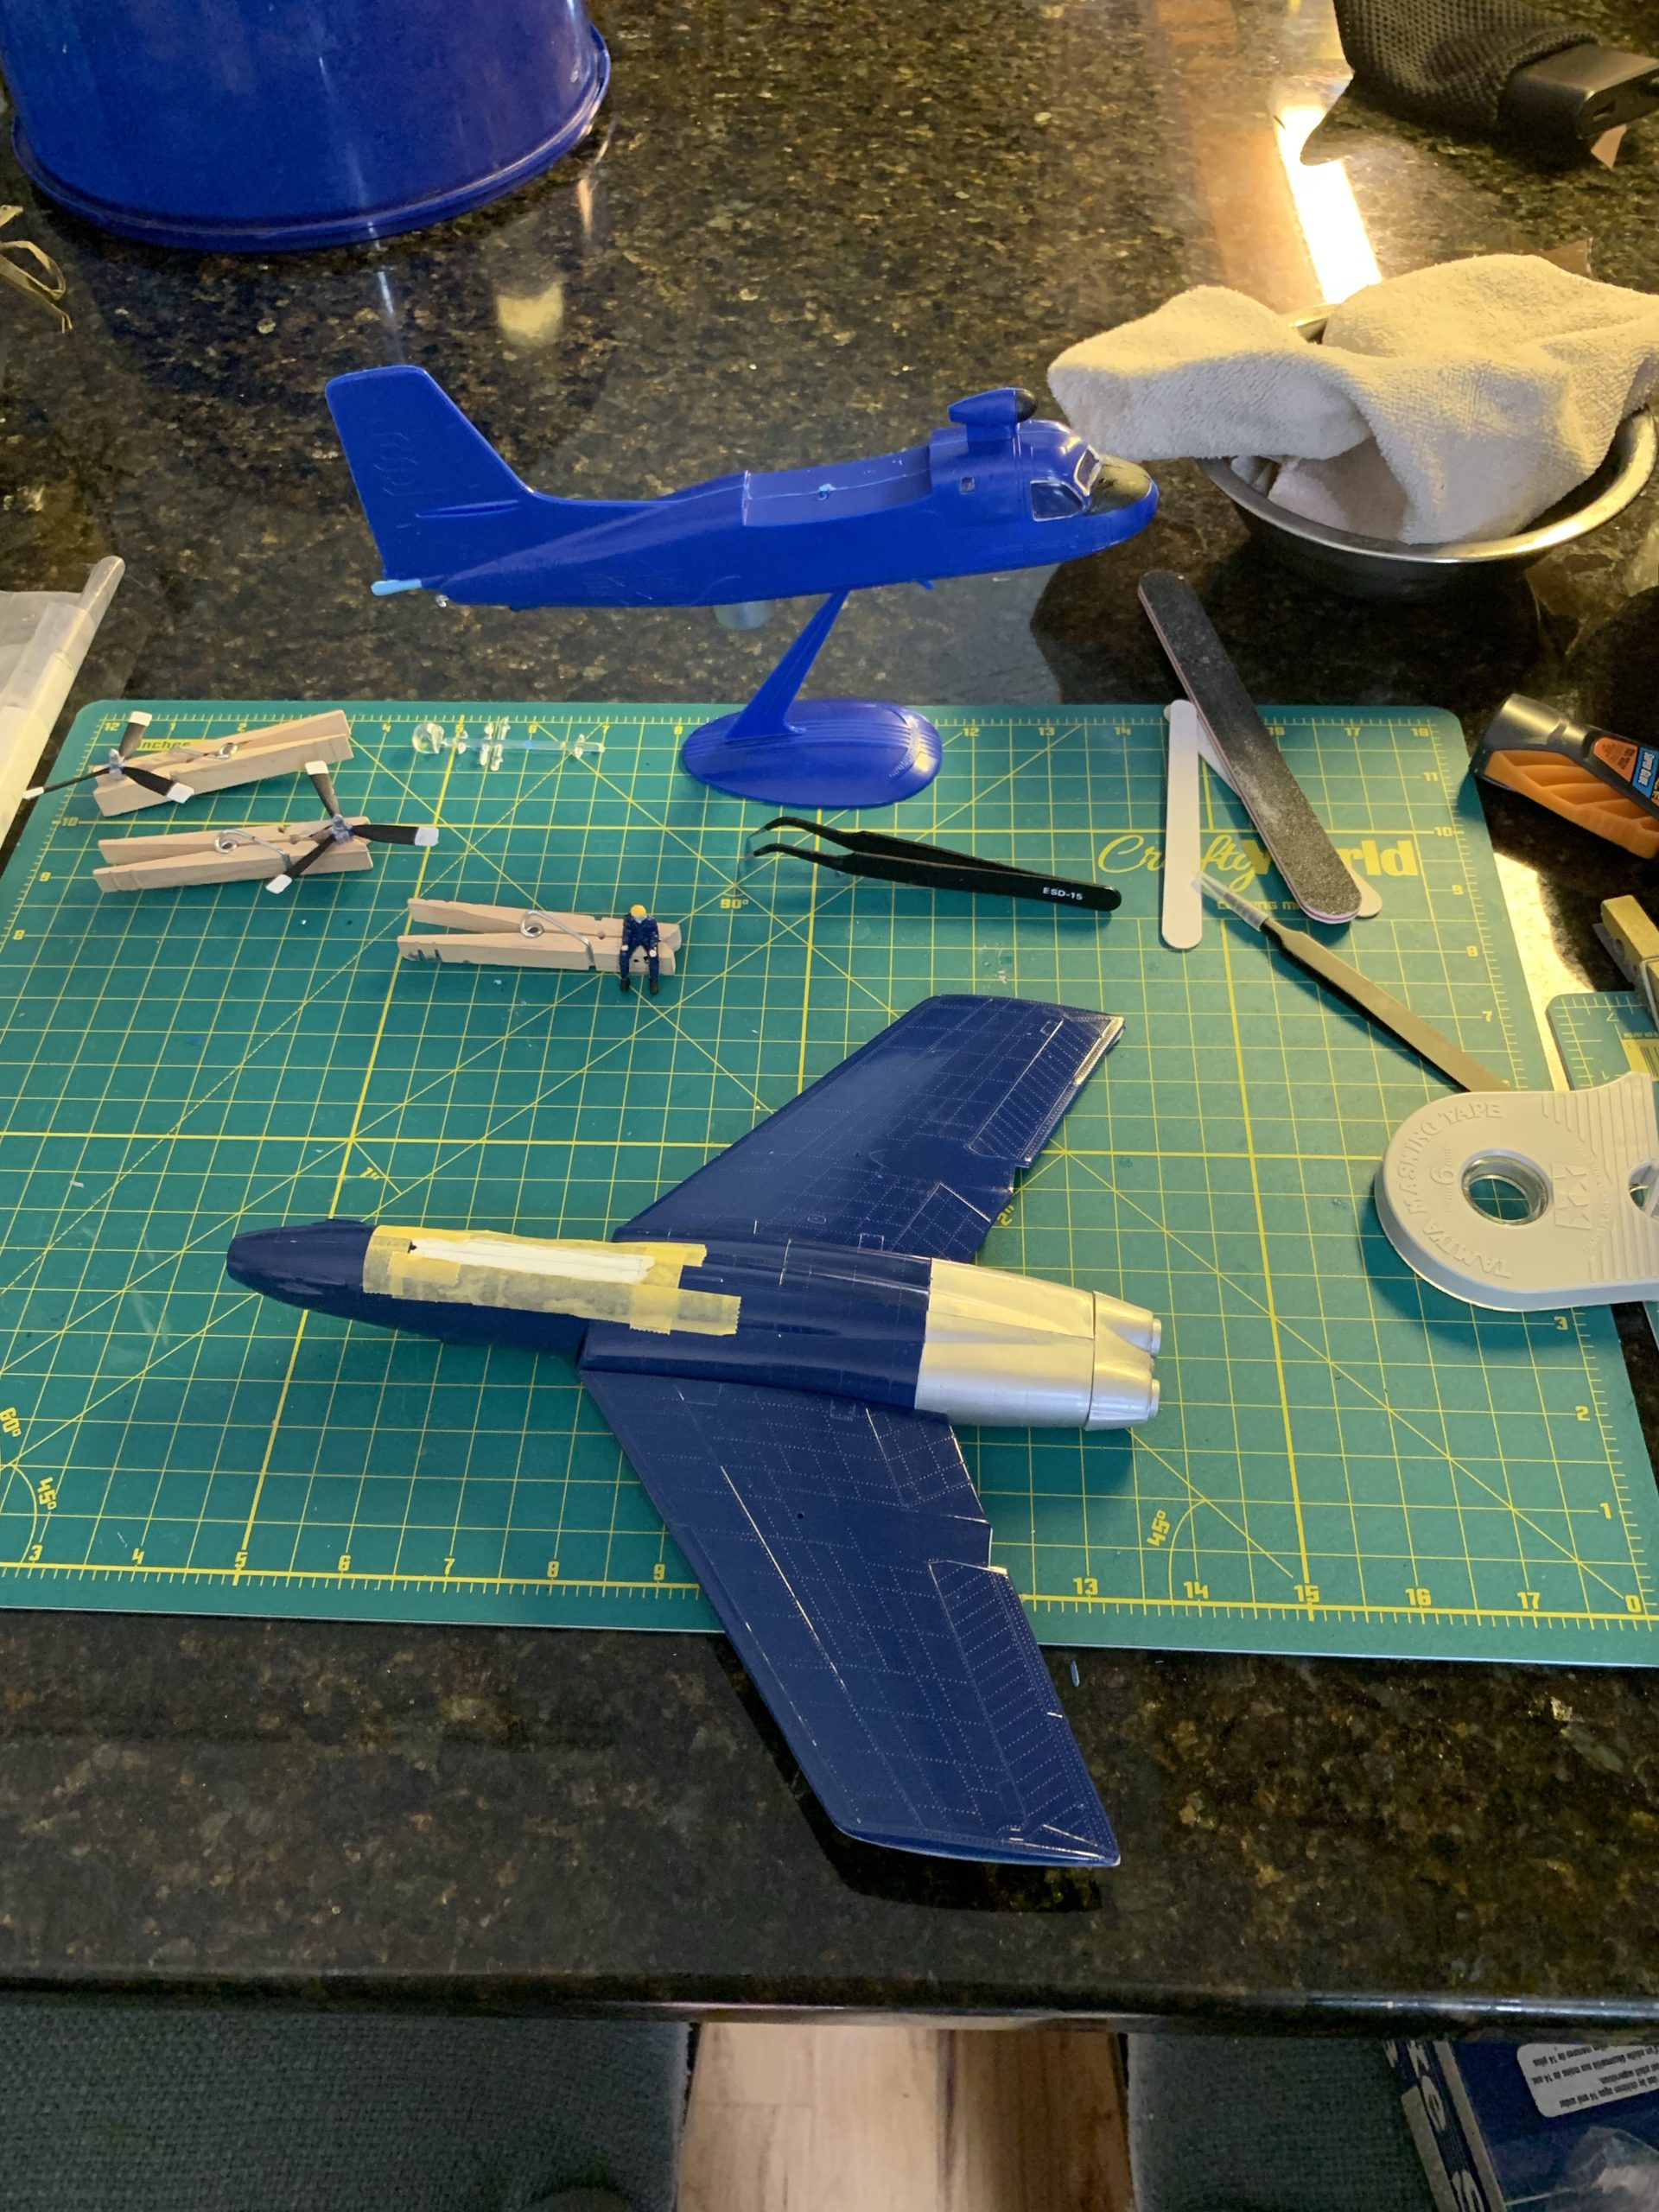
On the S2F the wings were actually 6 different pieces. The two piece (upper and lower) mid-wing which attached to the fuselage, and engines, and the upper and lower prices of the left and right outer wings. Attaching the other wings was a bit tricky, the starboard wing went on without a hitch, but the port wing had a gap I had to backfill with putty. It’s my own fault though as I was trying to install the wings in a hurry during a lunch break. Basically the S2F being designed to loater over open seas in hunt of submarines, has very long almost glider-like wings for maximum lift at slow speeds for extended periods. In model form this means the outer wings needed a lot of support for attachment and glue drying. Basically I didn’t provide enough of this support for the port wing and got a small but manageable gap I could fill in with putty.

Decals vs Decals
For the Lindberg kit in this case I didn’t use the factory decals, although you may already know that I’m a fan of Lindbergs decals. I basically wanted to do something different with this kit. I had built a Lindberg F7U once before in about 1992 or 93’. After building it I found out the F7U was briefly used by the Blue Angels, and wished that was an option on the kit I had built. This time around thanks to having the internet, I was able to build the kit again with decals specific to the Blue Angels F7U from Draw Decals. Draw Decals, carries a lot of unique decal sets and this was my first time using their stuff. Unlike most manufacturer decals, Draw Decals sheets aren’t die cut. This means each decal has been cut out of the sheet with little to no excess, so you have to basically cut as close to the decal as possible. If not you’ll have a lot of transparet, yet hard to work with excess, that can cause a lot of wrinkling problems, among other things. I know this from attaching the first decal. Once I was able to get past the excess material learning curve, it was easier to work with the decals, although due to being thin material, there’s a lot of work controlling wrinkles, but for the work involved they look good, and I have unique looking model that is a bit of an eye catcher.
On the S2F this kit has some unique decaling features as well. First like Lindberg decals, Atlantis decals are thick, colorful, and easy to work with which is a plus to me. However, this kit also has area’s molded into the plastic that indicate the placement of each decal. I know it seems like cheating when placing decals, but the indicators give you nice even placement of each decal, so they line up properly without guesswork. I loved it.
Aircraft vs Aircraft (finished)
With custom decals, and the paint The F7U looks pretty neat, even considering its a simplistic Lindberg kit. Then again Lindberg has (or had?) a knack for picking unique subject matter and the F7U definitely fits the bill on that, as you aren’t going to find a lot of other F7U kits out there, let alone donning Blue Angels livery. Taking this kit meant to be built as a rather generic looking Navy aircraft, and researching, painting, and custom decaling it as a short lived Blue Angels aircraft definitely makes it feel like my own creation. Even with the issue of the dorsal fuselage not lining up, I still love the little aircraft.
As for the S2F it was also a joy to build. Albeit there was now real room for customization outside of the option to paint the aircraft in its mid-60’s gray paint scheme. However, like the F7U above the S2F is unique subject matter, it’s not exactly the glamorous and exciting F9F, F-8, F-4 fighters the aircraft shared the carrier deck with over the years and that everyone wanted to build models of. Rather, it’s a utility aircraft designed for a job it never actually had to carry out. The kit was a combination of simplicity, and technicality as unique paint schemes met molded decal placements, and what in appearances looked like an easy to build kit turned out to be so much more. In case you can’t tell I enjoyed building it.
What kit should you build?
I’m picking the S2F for a few reasons. The first is that the American made Atlantis kits and can be picked up on Amazon, or at your local Hobby Lobby meaning they’re easy to find and inexpensive. Second, it comes molded in color (it blends well with Model Master French Blue) meaning no spray painting is needed unless you want it in mid-60’s gray. Third, it has a lot of detail, yet the detail doesn’t hinder the building experience. Lastly, it’s just the right amount of fun, and challenge as some parts do need to be painted with a little detail, yet the kit isn’t going to drive you nuts on that. For an experience builder like myself, I found it an enjoyable build.
Leave a Reply